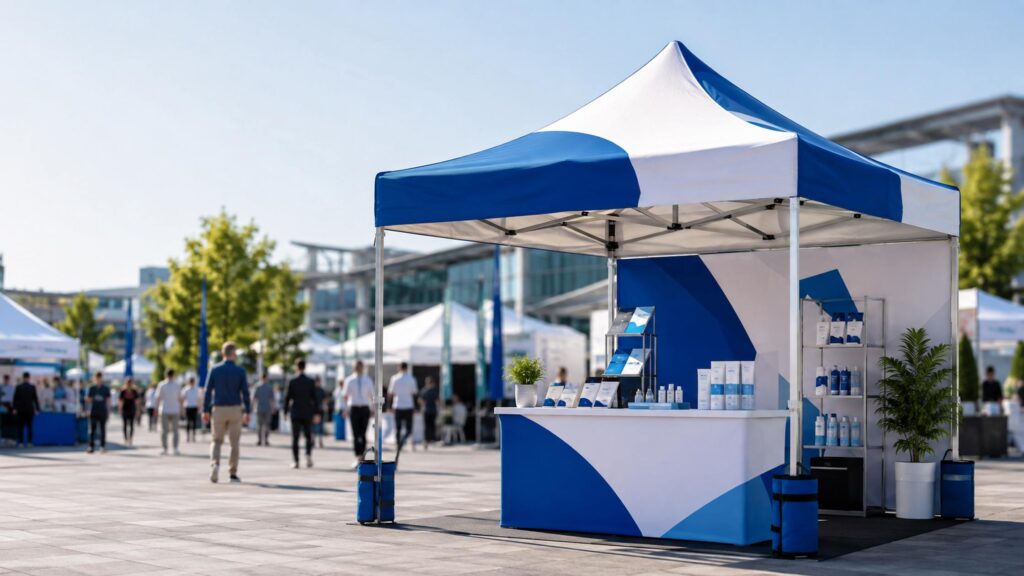
A custom promotional tent is more than a temporary shelter. At a trade show, farmers’ market, product launch, sports event, or outdoor activation, it becomes a branded space that helps people spot your business, understand what you offer, and feel comfortable enough to stop and engage.
The right tent should therefore do three jobs well: represent your brand, support the way your team works, and withstand repeated transport and setup. This guide explains how to compare sizes, frames, fabrics, printing options, sidewalls, and suppliers—and how to set up a canopy tent safely once it arrives.
1. Start With the Event, Not the Tent
Before comparing product specifications, define how the tent will be used. A distributor buying tents for resale has different priorities from a beverage brand planning a national sampling campaign. Ask:
- Will the tent be used indoors, outdoors, or both?
- How many people, counters, display racks, or products must fit underneath it?
- How often will it be transported and assembled?
- Will the same graphics be used for several campaigns?
- Does the venue require flame-resistance documentation?
- Will the tent need privacy, storage, rain protection, or crowd control?
- Who will set it up, and how much time will they have?
These answers turn a vague request for a “custom tent” into a useful specification. They also help a supplier recommend the correct frame grade instead of simply quoting the lowest-priced model.
2. Choose the Right Event Tent Dimensions
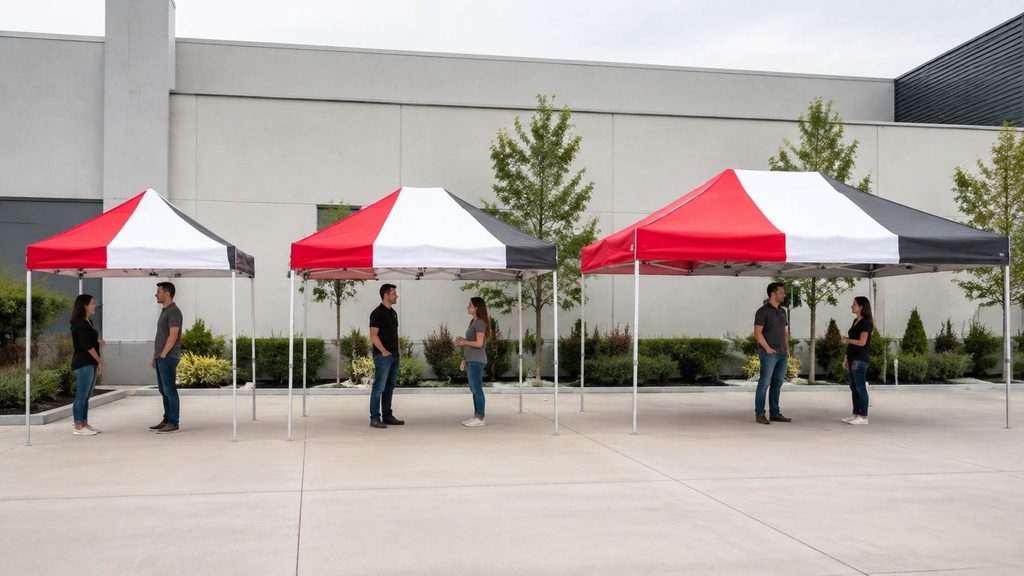
Common event tent dimensions for promotional pop-up canopies include:
| Nominal size | Approximate metric size | Typical use |
|---|---|---|
| 5 × 5 ft | 1.5 × 1.5 m | Registration point, sampling station, compact indoor display |
| 10 × 10 ft | 3 × 3 m | Standard vendor booth, market stall, single-brand activation |
| 10 × 15 ft | 3 × 4.5 m | Product demo with stock or a small customer area |
| 10 × 20 ft | 3 × 6 m | Multi-station promotion, hospitality area, larger retail display |
A straight-leg 10 × 10 ft model normally provides a 100-square-foot footprint. Be careful with slant-leg models: the advertised footprint may describe the leg spread rather than the usable shade area at the roof.
Do not choose by footprint alone. Confirm the valance height, peak height, entry clearance, collapsed dimensions, packed weight, and shipping-carton size. These details affect visibility, van capacity, warehouse storage, courier charges, and whether the packed frame can be handled by one person.
For exhibition booths, check the organizer’s maximum height and boundary rules before approving artwork. A tall peak, flag, or printed back wall may violate venue restrictions even when the floor dimensions are correct.
3. Pop-Up Canopy vs. Frame Tent
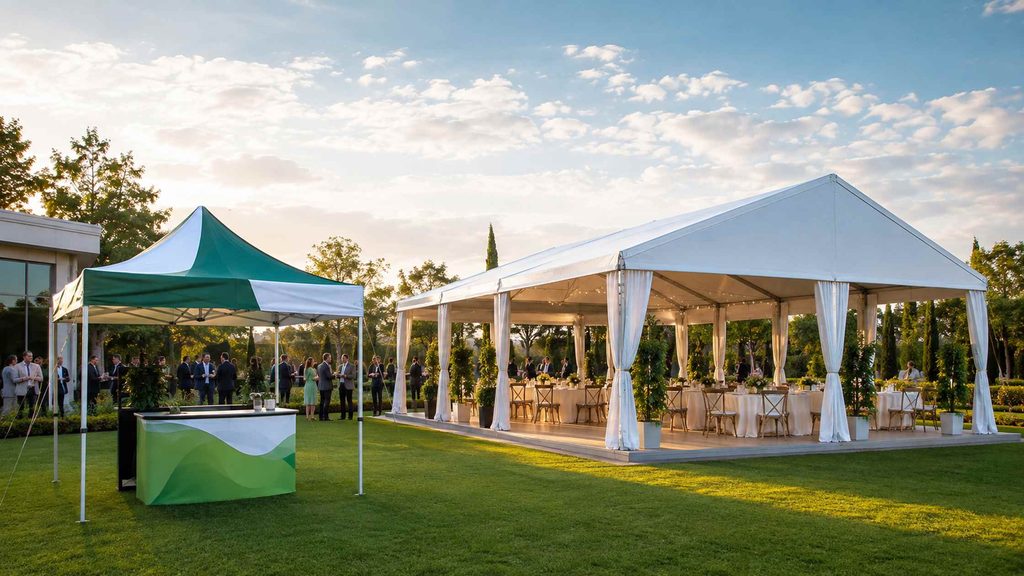
The phrase canopy tent vs frame tent can be confusing because sellers do not always use the terms consistently. In practical event purchasing, a pop-up canopy usually has a collapsible accordion frame that opens as one connected unit. A larger event frame tent is assembled from separate structural members and covered afterward.
| Buying factor | Pop-up canopy | Event frame tent |
|---|---|---|
| Best use | Vendor booths, roadshows, short events | Larger or more formal temporary venues |
| Setup | Fast, usually with a small crew | More components, labor, and setup time |
| Transport | Compact when folded | Bulkier and often requires dedicated transport |
| Interior | Open for a small booth | Broad, unobstructed layouts are possible |
| Branding | Excellent roof, valance, and wall visibility | Large surfaces, but customization is more complex |
| Scalability | Add adjacent units or connectors | Better suited to large engineered layouts |
Choose a pop-up canopy when portability, repeat use, and pop up canopy easy setup are priorities. Choose an event frame tent when the project requires a large continuous interior, longer installation, flooring, lighting, HVAC, or a more formal venue. For substantial temporary structures, involve an experienced tent contractor and comply with local permitting and fire-safety requirements.
4. Compare Steel and Aluminum Frames
The frame influences portability, durability, corrosion resistance, and price.
Steel frames are often the economical choice. Their weight can feel reassuring, but they are heavier to transport and need a durable coating plus proper storage to reduce corrosion risk.
Aluminum frames are usually lighter and corrosion-resistant, making them attractive for teams that travel and set up frequently. However, the word “aluminum” alone does not prove commercial quality. Compare the leg profile, wall thickness, truss design, connectors, replacement-part availability, and warranty.
For frequent commercial use, inspect the details that receive repeated stress: footplates, corner joints, peak supports, slider mechanisms, pull pins, and fasteners. Ask whether individual components can be replaced. A repairable frame can have a much lower total cost of ownership than a cheaper unit that must be discarded after one damaged part.
5. Understand Fabric, Waterproofing, and Sidewalls
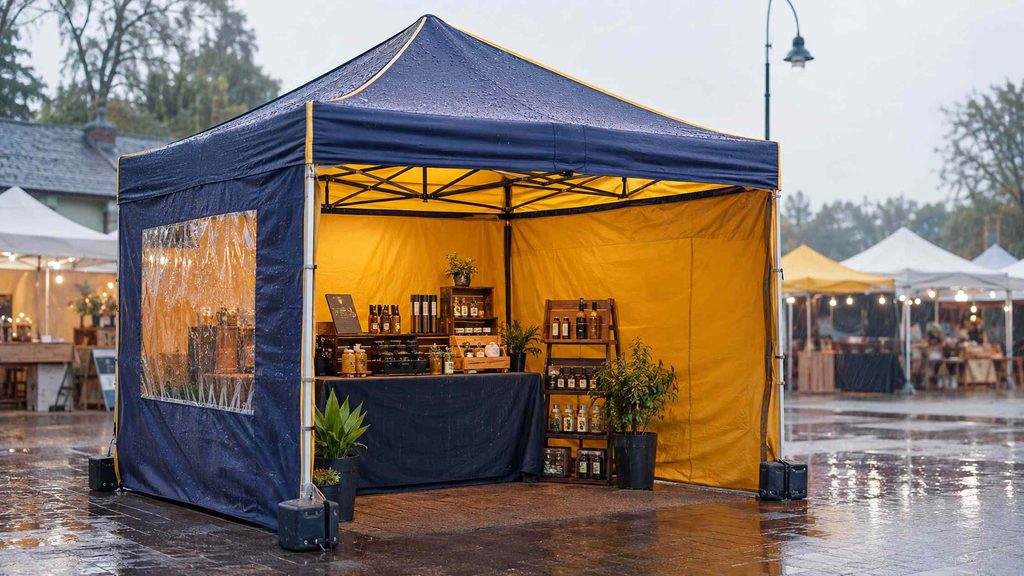
A waterproof pop up canopy with sides is useful for check-in desks, merchandise, food-service support, medical stations, and events where privacy or wind-driven rain is a concern. Yet “waterproof” should be treated as a specification to verify, not a complete weather guarantee.
Ask the supplier for:
- Fabric type and weight or denier
- Coating type and documented water-resistance test method
- Seam construction and whether seams are sealed
- UV-performance information
- Flame-resistance certificates required by the destination market or venue
- Colorfastness expectations for repeated outdoor exposure
- Cleaning and storage instructions
Sidewall choices commonly include full walls, zippered door walls, window walls, and half walls. Full walls create privacy and more printable area; half walls keep the booth open and approachable. A back wall can hide cartons and staff belongings while presenting a strong visual background.
Sidewalls also change how wind acts on the tent. Never assume that adding walls makes a canopy safer. Follow the manufacturer’s weather guidance, use the specified anchoring system, and take the tent down when conditions exceed its limits.
6. Plan Graphics for Real Viewing Conditions
Custom printing should be designed around how visitors approach the booth.
- Put the logo or brand name on the valance for eye-level recognition.
- Use the roof panels for visibility from farther away.
- Reserve full walls for a campaign message, product image, QR code, or service explanation.
- Keep critical text away from seams, folds, hook-and-loop strips, and hardware.
- Make QR codes large enough to scan at the intended distance and test them on a printed proof.
Dye-sublimation printing is widely used for full-color polyester graphics because the image becomes part of the fabric. Screen printing may be economical for simple logos and limited colors at volume. The best method depends on the fabric, quantity, color requirements, artwork complexity, and expected use.
Provide vector artwork when possible. Include brand-color references, font files or outlined text, image-resolution requirements, and exact panel placement. Before mass production, approve a scaled layout and, for color-critical programs, a physical strike-off or sample. Remember that a screen color and a fabric print will not appear perfectly identical under every light source.
7. Specify the Complete Kit
The canopy is only one part of a usable event system. A practical kit may include:
- Printed roof and selected walls
- Commercial frame
- Stake and guy-line kit for suitable ground
- Manufacturer-approved weights for hard surfaces
- Wheeled transport bag
- Protective bags for printed walls
- Rain gutter for linking compatible units
- Half-wall rails, counters, banners, or flags
- Spare pins, fasteners, feet, and repair patches
Ask the supplier to list every component on the quotation and packing list. This prevents surprises such as receiving printed walls without the rails needed to support them.
8. How to Set Up a Pop-Up Canopy
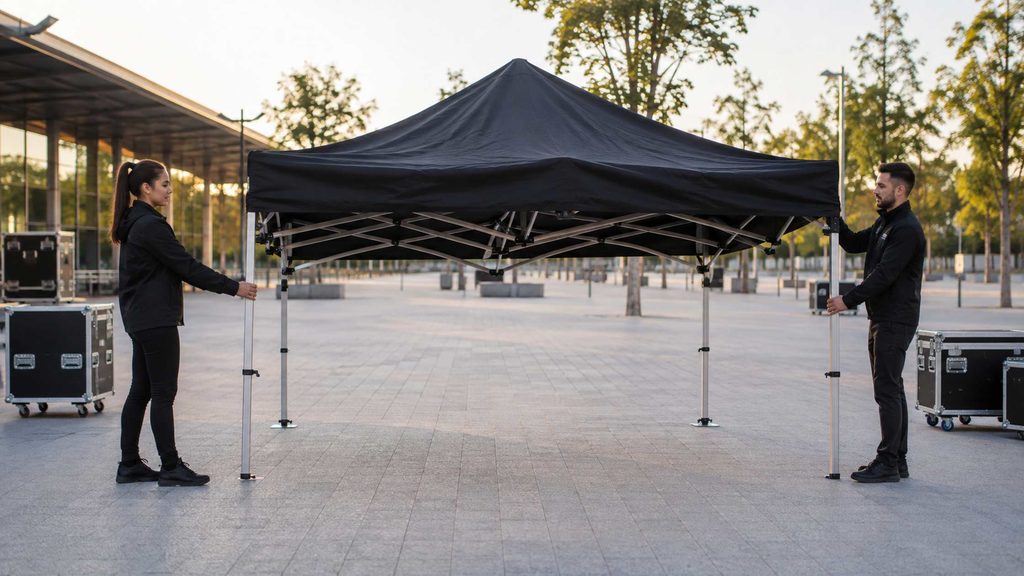
Model-specific instructions always take priority, but the following general process explains how to set up pop up canopy systems with an accordion-style frame:
- Inspect the site for overhead lines, underground services, uneven ground, traffic, and venue restrictions.
- Remove the frame from its bag and position it where the tent will stand.
- With one person at each side or corner, lift the frame slightly and walk backward to open it partway. Do not force the trusses.
- If the roof is not already fitted, place it over the partially opened frame, align the corners, and attach it according to the manual.
- Continue opening the frame evenly. Lock the corner sliders without placing fingers near pinch points.
- Raise the legs gradually, moving around the tent so that the structure stays level.
- Attach walls and accessories only as instructed.
- Anchor every leg immediately using the system specified for the surface and model.
- Check all locks, roof tension, fasteners, stakes or weights, and guy lines before use.
This is also the basic answer to how to set up a canopy tent, but larger modular frame tents use a different process and may require trained installers. Never improvise with an unfamiliar system.
9. How to Put Up a Canopy Tent More Efficiently
Teams searching how to put up canopy tent equipment are often trying to solve a workflow problem, not just learn the mechanics. A short operating routine makes multi-location campaigns more consistent:
- Number each tent and accessory bag.
- Keep a laminated setup checklist inside the transport case.
- Assign one crew leader to call each step.
- Practice once before the first public event.
- Photograph the correctly packed kit so staff can repack it the same way.
- Dry and clean the roof and walls before storage.
- Record damage immediately and replace parts before the next activation.
Do not drag a printed top across the ground or fold it while wet. Dirt trapped in folds can abrade the print, while stored moisture can encourage staining, odor, or mildew.
10. Anchoring and Weather Safety
A pop-up canopy is a temporary shelter, not an all-weather building. Every installation needs anchoring even on a calm day. Stakes and guy lines may be appropriate on approved soft ground; hard surfaces require compatible ballast or another manufacturer-approved method. Local event rules may set additional requirements.
Do not rely on generic weight recommendations copied from another brand. Required anchoring depends on the model, size, walls, surface, wind exposure, and manufacturer’s engineering. Monitor weather throughout the event. If strong wind, lightning, heavy rain, snow accumulation, or unsafe conditions are expected, evacuate and dismantle the canopy according to the event plan.
“Waterproof” describes fabric performance under defined conditions. It does not mean the complete structure is safe in severe weather, and it does not replace correct anchoring or drainage.
11. Evaluate a Supplier Before Ordering
For a custom or bulk order, request a written specification rather than relying on product photos. The quotation should cover:
- Exact open and packed dimensions
- Frame material, profile, thickness, and weight
- Fabric, coating, print method, and seam treatment
- Included walls, hardware, anchoring equipment, and bags
- Artwork template and proofing process
- Sample cost and approval stages
- Minimum order quantity and price breaks
- Production lead time and shipping terms
- Carton dimensions, gross weight, and pallet details
- Warranty, spare parts, and claim procedure
- Test reports or certificates relevant to the destination market
For private-label or distributor programs, also confirm packaging artwork, barcodes, manuals, country-of-origin marking, batch consistency, reorder color matching, and the period for which replacement parts will remain available.
When evaluating samples, run a realistic trial. Time the setup, inspect the print at close and long range, check stitching and roof fit, attach every wall, pack the kit into its bag, and have the actual field team carry it. A sample that looks impressive in a showroom may still be awkward in daily use.
12. Final Buying Checklist
Before placing the order, confirm that:
- The footprint and height comply with target venues.
- The packed size and weight fit the transport plan.
- The frame grade matches expected setup frequency.
- Fabric claims are supported by relevant test information.
- Required flame-resistance documentation is available.
- Artwork, colors, print areas, and proof approval are documented.
- Sidewalls support the booth layout without creating an unmanaged wind risk.
- Anchoring equipment is suitable for each surface.
- Spare parts and after-sales support are available.
- Lead time includes sampling, production, inspection, and delivery contingency.
Conclusion
The best custom promotional tent is not automatically the largest, heaviest, or least expensive option. It is the tent that fits the venue, protects the brand presentation, works with the field team’s setup routine, and can be maintained across repeated events.
Begin with the event scenario, choose realistic dimensions, compare the complete frame-and-fabric specification, and treat artwork, anchoring, accessories, and after-sales support as part of the purchase. A well-specified canopy becomes a repeatable branded environment—not merely a printed roof.